For many, when they think of WordPress, they think “blog.” And while WordPress is one of the world’s largest blogging platforms, WordPress is also a complete content management system and is a great way to build many different types of websites. This article will show you how easy it can be to get your blog, or website, up and running quickly.
You decided to use BlueHost for your Web Hosting
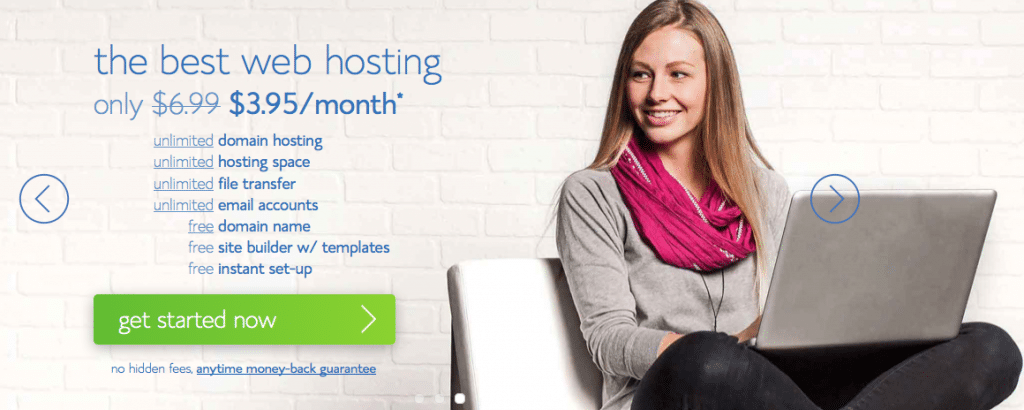
There are many hosting companies out there, but for a WordPress site, Bluehost should definitely be at the top of anyone’s list. Bluehost is the only hosting service officially recommended by WordPress and has been the number-one recommended hosting
And to sweeten the deal even more, if you sign up through this tutorial, you’ll get a special offer of shared hosting at $3.95/month for 36 months, as well as a free domain name for a year!
To set up your hosting account with Bluehost, follow the steps below. It will speed up the process to think of a domain name you want to use and to have your credit card for payment ready to go before you get started.
Set Up Your Hosting Account
To get started, go to Bluehost’s home page and click “Sign Up Now.”
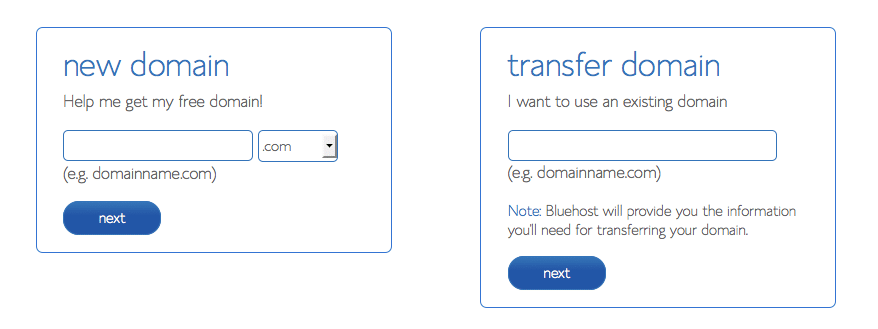
Next, you need to choose a domain name for your site. If you already own a domain name, you can enter it here, and you will just have to go through a few extra steps to make sure you get your DNS pointed to Bluehost. If you don’t already have a domain name, you can purchase one from right in the sign up process, and the best part is, it comes free with your new WordPress hosting account purchase.
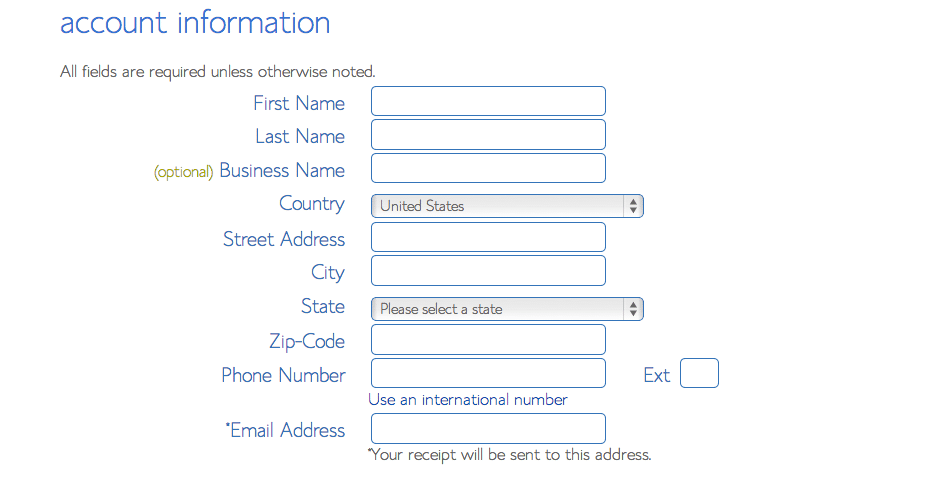
Once you’ve entered a domain name, you’ll fill in your personal information.
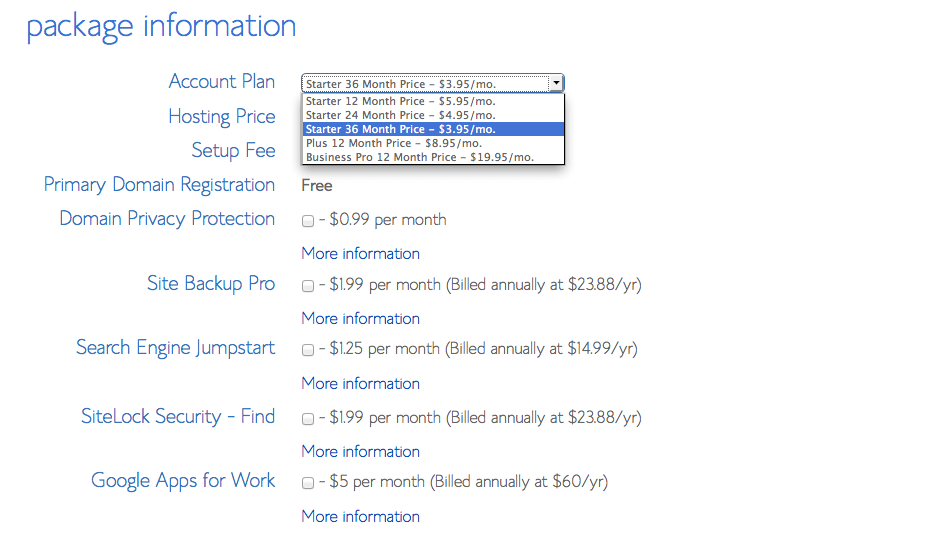
Then, you’ll choose which hosting package you want. Normal, shared hosting is priced at 12, 24 and 36-month terms. To help save you money, the longer term you purchase, the lower the monthly rate will be. For example, by choosing a 36-month hosting term, you can get the great introductory rate of $3.95/month.
There are few other offers provided at sign up, which you can include at your discretion. One we recommend is Domain Privacy, a paid service that allows personal information to be kept private on WHOIS databases.
After you’ve filled in your information and chosen your hosting package, click the “Next” button to complete your purchase. You’ll then be asked to create a password for your account. You can use the Password Generator to create a strong and secure password, or create one yourself.
Now that you are all signed up and are able to log into your account, you can get started installing WordPress!
Installing WordPress
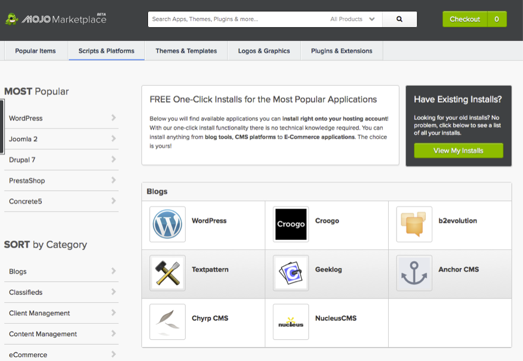
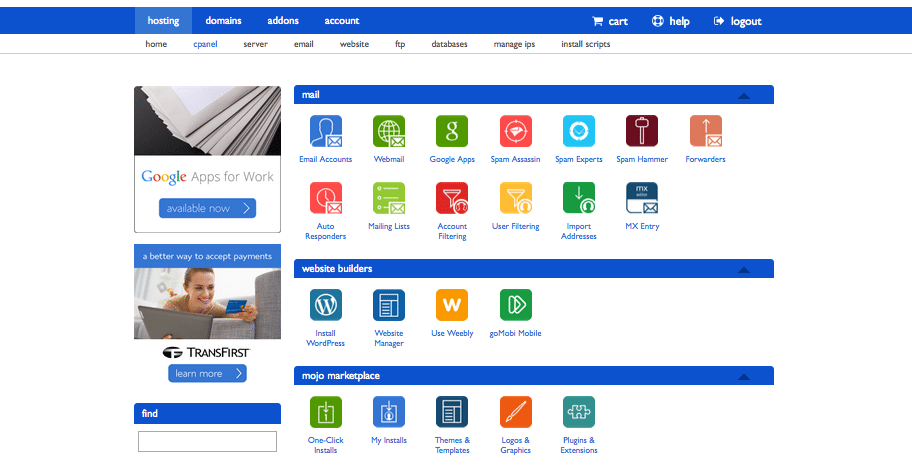
This may seem like the most complicated step, but Bluehost has worked hard to make this one of the easiest things for you to do. In your cPanel, scroll to the section titled “MOJO Marketplace” and choose the “One-Click Installs” button. This will take you to a page inside MOJO Marketplace called Scripts and Platforms. The blog section is at the very top, so all you have to do here is click on the WordPress icon.
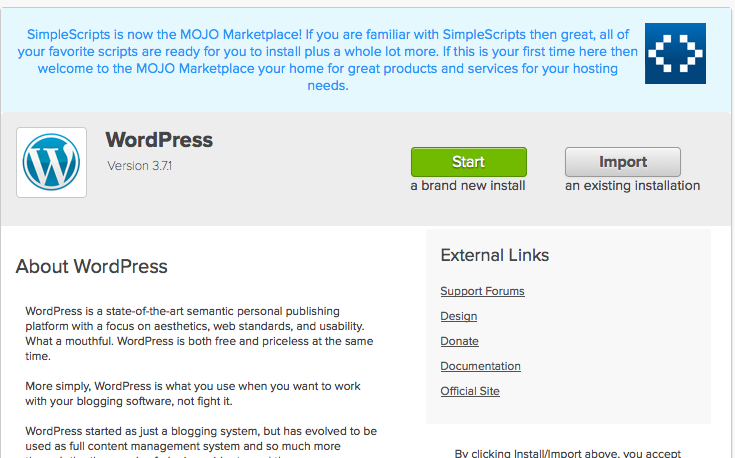
This will open the installation window. Click on the green “Start” button that will start the WordPress installation process, which has a few easy steps.
Step 1: Choose where you want to install WordPress. This can be any domain on your account, or a subdomain or a folder for one of your domains. Next, click on “Check Domain,” which will make sure the domain is assigned and pointing to your account. You may get a warning that you are overwriting files, but as long as you don’t have another website built yet, you can check the box and continue. This is mostly to make sure that you really want to install in that location. If you do have other sites built, you will want to make sure you’re not overwriting something important.
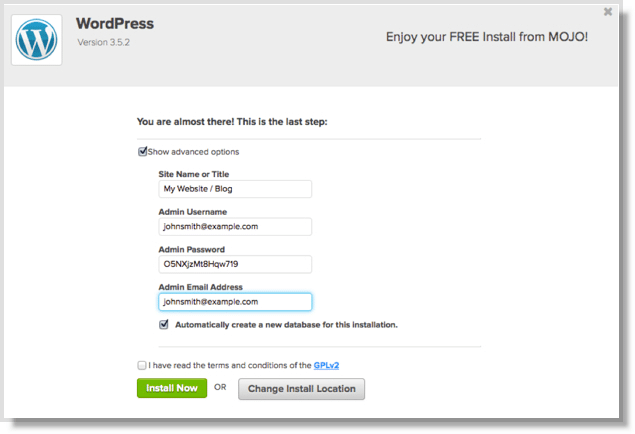
Step 2: Show Advanced Options. This section allows you to set up your own username and password for your WordPress install. IT is recommended to use a different username than “admin” and a very strong password. Make sure that the “Automatically create a new database for this installation” box is checked, unless you have a database already set up that you want to use.
Step 3: After you’ve read the terms and conditions, check the box indicating that you’ve done so, then click “Install Now.”
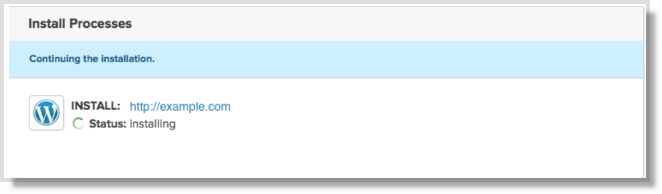
Now you’ll see the progress page, which will show you how far along the installation is. Once WordPress is fully installed, it will provide you with your site URL, the admin login URL, your username, and password. You will get a copy of this information, except your password, in your email as well. Make sure to keep it in a safe place.
Now you can log into your WordPress site by going to the admin login URL. Enter your username and password, then click “Log In.” This will take you to your WordPress dashboard. From here, you can control everything to do with your WordPress site, such as creating pages, writing posts, and changing the appearance.
Remember, if you sign up through this tutorial, you’ll receive a special offer of shared hosting at $3.95/month for 36 months, as well as a free domain name for a year!